
Open Farmhouse Modern Kitchen Shelves
Open Farmhouse Modern Kitchen Shelves
Building those shelves wasn’t just a project—it was a game-changer. Letting Anna steer the style brought in that fresh, modern farmhouse vibe before I even knew it was a thing. Sometimes, the best handyman move isn’t just about tools and colors; it’s about giving space to the people who matter. And yeah, marriage upgrades? Definitely worth the extra love points earned.
The first step was to locate the studs to securely attach the back supporting boards. These anchor boards must be rock-solid, capable of handling the metal pipe fasteners and bearing the entire weight of the shelves without a hint of give. Skimping here risks the whole structure collapsing—precision and strength are non-negotiable.
It's always smart to pre-stain or clear coat the backer boards and the shelves before you install them. Doing this at waist height saves you from awkward angles and drips later on, making the process faster and neater. Pre-finishing ensures even coverage, better protection against moisture, and a professional-looking finish from the start. Don’t wait until after installation—take control early and make your project smoother and stronger!
For the most water-resistant finish, I recommend using marine varnish. It’s specifically formulated to withstand harsh water exposure, providing superior durability and protection against moisture, UV rays, and mildew. This makes it ideal for any project that will face wet conditions or outdoor elements. Apply multiple thin coats, sanding lightly between each, for a smooth, long-lasting finish that keeps your surfaces looking great and well-protected.
I chose to use select pine wood from Lowe’s because it is both beautiful and reasonably priced. The natural finish perfectly complements the new farmhouse modern style, adding warmth and character without overpowering the design. Plus, it pairs seamlessly with the clean, minimalist lines of the Scandinavian look, making it incredibly versatile for contemporary interiors.
When buying wood, it’s always smart to take the most economical approach. For shelves measuring four feet wide by one foot deep, you have two practical options: either purchase two eight-foot pieces or three six-foot pieces. The best choice depends entirely on which option offers the better price, so always compare before buying to maximize value without compromising quality.
To complete the smooth look you see, I rounded the front edge of the shelves using my router. This not only softened the appearance but also gave the shelves a more polished, professional finish. For the backer board, I beveled all four edges to enhance the clean, crisp lines and eliminate any sharp corners. The combination of rounded fronts and beveled edges took the entire piece to the next level in both style and safety.
Using a level is crucial to ensure your backer board and shelves are perfectly straight. The pipe anchor will align easily with the line on the backer board, giving you a flawless guide. Once that's set, all you need is your power drill to securely screw everything together. This method guarantees a strong, precise installation every time.
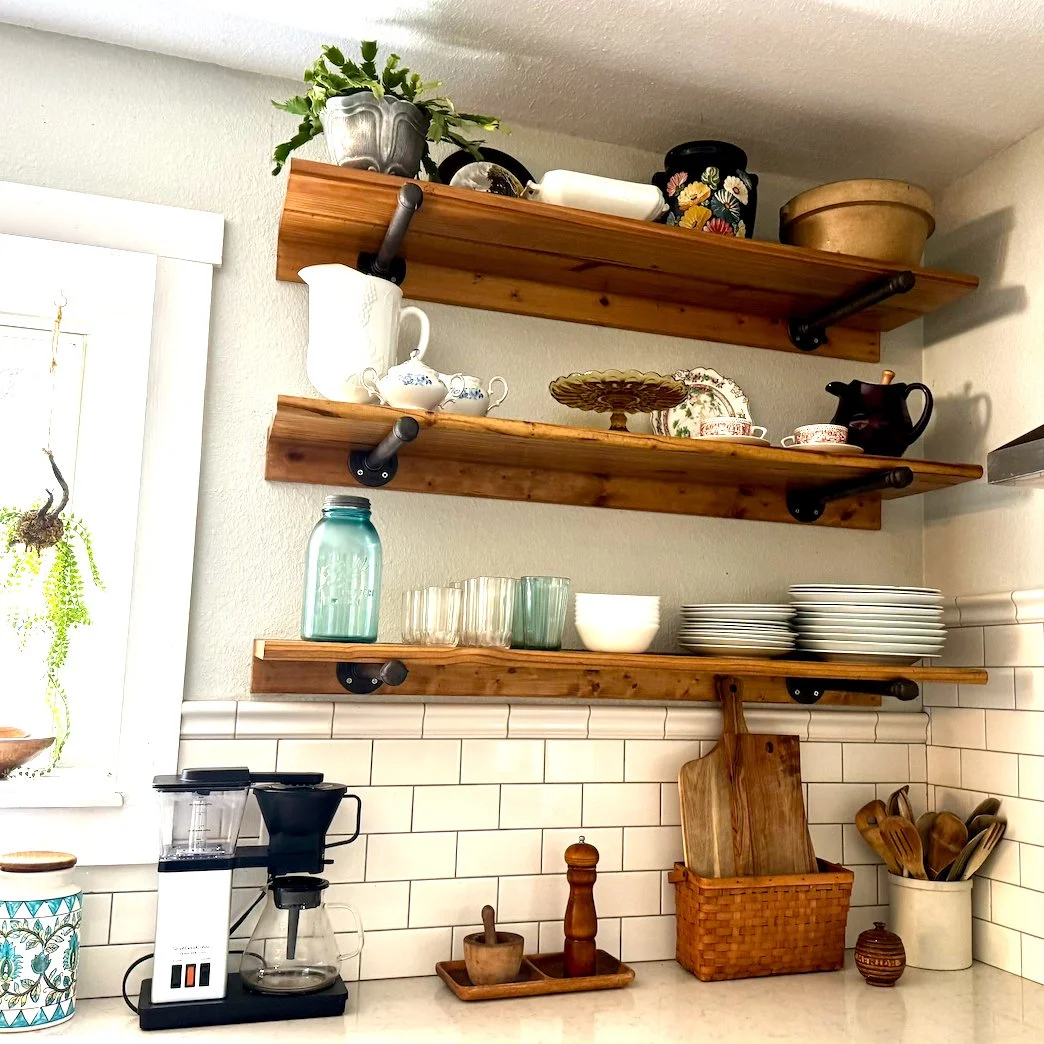
By this point your wife will be really happy with you and she won't be able to wait to place all of her dishes on her new gorgeous shelves. These shelves aren’t just storage – they’re a statement. Sleek, sturdy, and perfectly crafted, they transform the kitchen into a space that’s as functional as it is beautiful. Every plate, bowl, and glass will have its own spotlight, showing off not just her collection but your undeniable skill. Satisfaction is guaranteed when you see her smile light up every time she reaches for her favorite dish.
If you think you can DIY this shelving project, just go for it. But if you need some help from a professional handyman, ReCreate Life Handyman is here to make it happen. Email us your project idea, and we’ll get right back to you with a free phone estimate. We look forward to bringing your home back to life!